Anatomy of a Configurable Widget
7 October 2023 • Development • Swift • SwiftUIIn my previous post, Anatomy of a Widget, I outlined my basic understanding of building a simple widget in Xcode. These were the most trivial widgets possible: they provided no options, and certainly no interactivity as introduced with iOS 17. In this post, I’m going to write up my (also limited) understanding of the parts that need to be added to provide configurable options within the widget—in other words, those the user sees when they long press on a widget and hit “Edit”.
The previous post introduced the concept of the the timeline entry, the timeline provider, the widget’s view, the widget definition, and the widget bundle. We’ll be adding one more, the configuration intent, and tying it in to the rest.
- The Configuration Intent
- Updating the Timeline Entry
- Updating the Timeline Provider
- Updating the Widget’s View
- Configuration Intent Parameters
The same major caveat as before continues to apply: I still do not fully understand widgets, or really know how to build them properly. Nor do I understand interactive widgets that come in with iOS 17. But, hopefully, my knowledge will increase and I can update these posts as I learn more! Please do not hesitate to let me know about anything I write here that’s misleading or factually incorrect.
The Configuration Intent
iOS apps use what Apple refers to as “intents” to tell other parts of the system what the app can do—such as Siri, or Shortcuts. The same mechanism is used by widgets to define what options are available, and we do this using a struct conforming to WidgetConfigurationIntent. This struct needs to hold all the parameters available to the user in the widget’s edit menu. For example, a very simple widget intent could look like the following:
import WidgetKit
import AppIntents

struct MyConfigurationIntent: WidgetConfigurationIntent {
    static var title: LocalizedStringResource = "Configuration"
    static var description = IntentDescription("This is an example widget.")

    @Parameter(title: "Favourite Emoji", default: "😃")
    var favouriteEmoji: String
}
This is about as basic as it gets, providing a single string parameter that will be exposed in the edit menu via a text field, with a sensible default. I’ll go through some other parameter types available later.
For now, we need to propagate the configuration intent throughout the rest of the widget’s stack.
Updating the Timeline Entry
The timeline entry is responsible for holding all the information the widget’s view needs to render for a given point in time. We need to update this to also hold the configuration intent. I will be using the example code from the previous post, and adding/amending it as necessary:
struct MyWidgetEntry: TimelineEntry {
    let date: Date
    let text: String
    let configuration: MyConfigurationIntent
}
Updating the Timeline Provider
Because the timeline entries are created by the timeline provider, we need to update this to include the configuration intent too. This time, we also need to change from conforming to the basic TimelineProvider protocol to the mode advanced AppIntentTimelineProvider protocol, which also necessitates changing the method signatures of the three methods, placeholder, getSnapshot, and getTimeline.
struct MyTimelineProvider: AppIntentTimelineProvider {
    func placeholder(in context: Context) -> MyWidgetEntry {
        MyWidgetEntry(date: Date(), configuration: MyConfigurationIntent())
    }

    func snapshot(for configuration: MyConfigurationIntent, in context: Context) async -> MyWidgetEntry {
        MyWidgetEntry(date: Date(), configuration: configuration)
    }

    func timeline(for configuration: MyConfigurationIntent, in context: Context) async -> Timeline<MyWidgetEntry> {
        var entries: [MyWidgetEntry] = []

        // Generate a timeline consisting of five entries an hour apart, starting from the current date.
        let currentDate = Date()
        for hourOffset in 0 ..< 5 {
            let entryDate = Calendar.current.date(byAdding: .hour, value: hourOffset, to: currentDate)!
            let entry = MyWidgetEntry(date: entryDate, configuration: configuration)
            entries.append(entry)
        }

        return Timeline(entries: entries, policy: .atEnd)
    }
}
For the placeholder method, the timeline provider isn’t handed a configuration, so it has to create one to pass to the timeline entry. For the other two methods, however, the first argument passed is a MyConfigurationIntent struct representing the options the user has selected in the widget edit view, and we can pass this directly to the timeline entry.
Updating the Widget’s View
The only thing left to do is update the widget’s View to make use of the options provided by the configuration intent. In this case, we can use the favouriteEmoji parameter, as it’s the only one provided by our very simple intent:
struct MyWidgetView : View {
    var entry: MyWidgetEntry

    var body: some View {
        VStack {
            Text(entry.date, style: .time)
            Text(entry.text)
            Text("Favourite Emoji:")
            Text(entry.configuration.favouriteEmoji)
        }
    }
}
And that’s it! The widget now allows the user to customise its view by presenting an edit menu with a bunch of parameters. The user-chosen values for these parameters are passed into the View as a Configuration Intent parameter via the timeline entry, and the View can make use of them as it wishes.
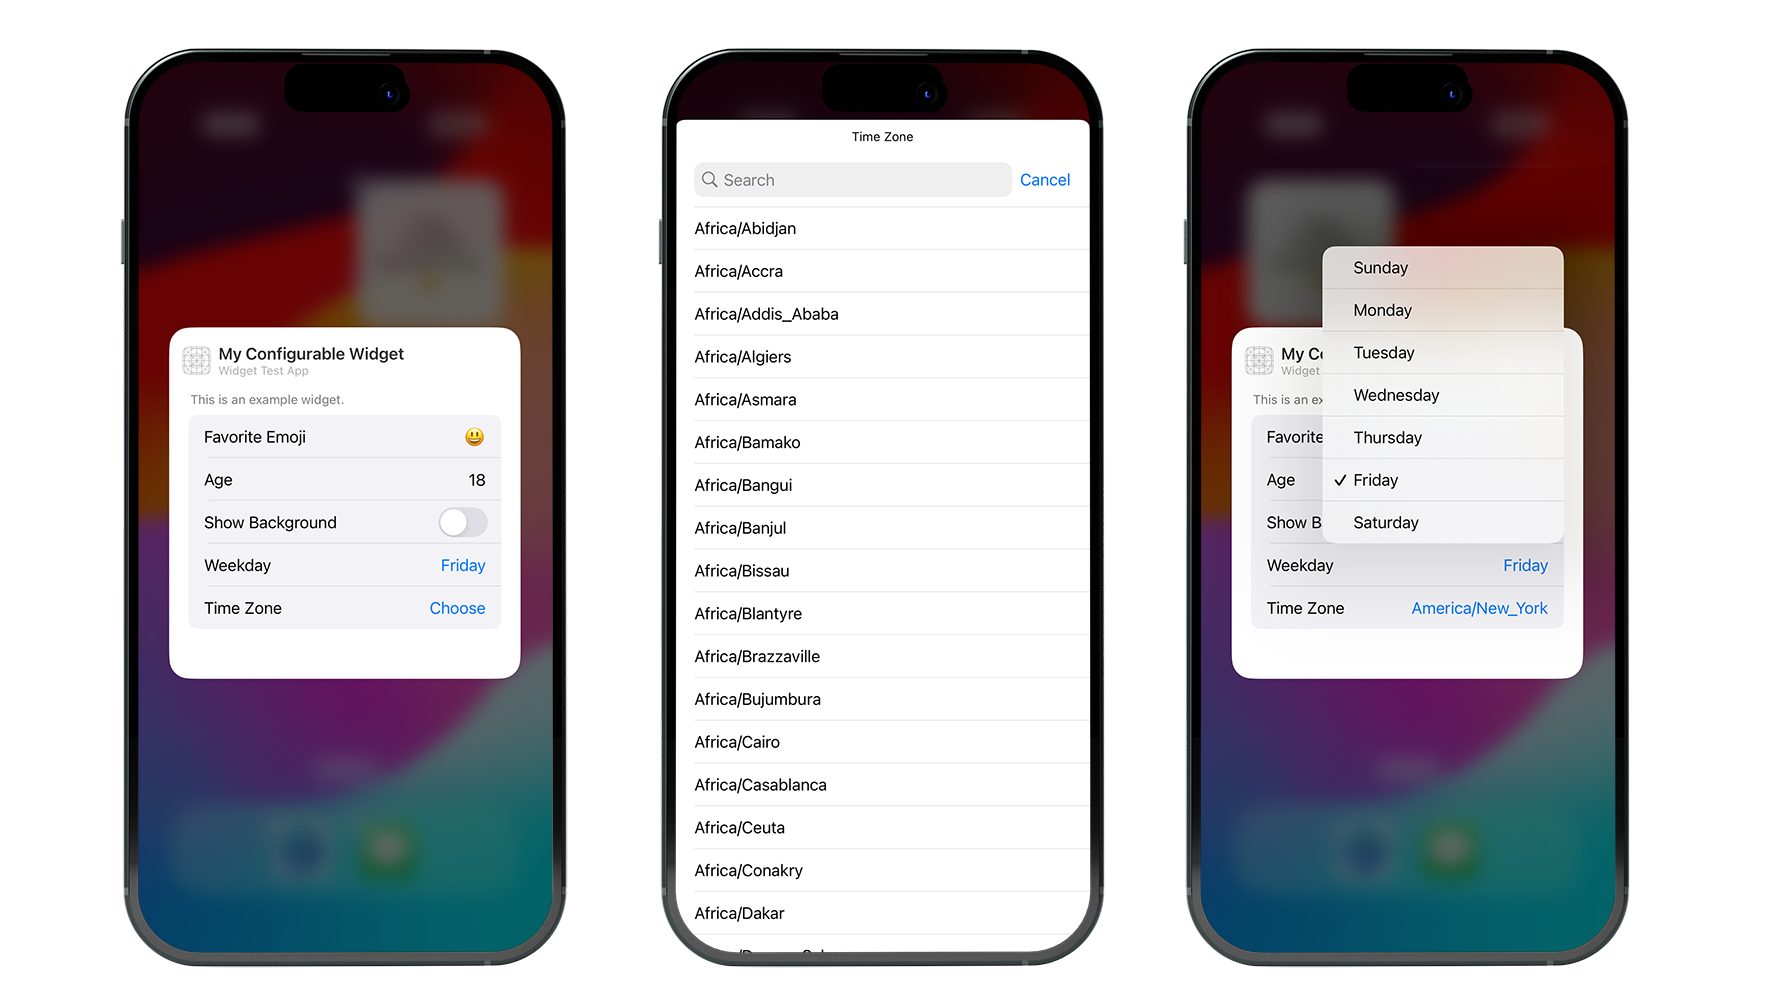
Configuration Intent Parameters
Above, we saw a very simple configuration intent parameter of a string:
@Parameter(title: "Favourite Emoji", default: "😃")
var favouriteEmoji: String
The title is the name of the parameter as shown to the user in the edit view of the widget, and the default you provide is what the parameter is set to when the user hasn’t edited the widget and entered something else. You can view the WidgetConfigurationIntent documentation for more options that are available, such as how to control the order the parameters appear in the widget edit view or define those which depend on others.
Adding other type of data is easy, such as asking for an integer:
@Parameter(title: "Age", default: 18)
var age: Int
Or a boolean:
@Parameter(title: "Show Background", default: false)
var showBackground: Bool
You can also present the user with a choice of options by conforming to DynamicOptionsProvider:
struct IntegerOptionsProvider: DynamicOptionsProvider {
    let count: Int
    let defaultInteger: Int
    func results() async throws -> [Int] {
        Array(0...count)
    }
    func defaultResult() async -> Int? {
        defaultInteger
    }
}

...

@Parameter(title: "Hour", optionsProvider: IntegerOptionsProvider(count: 24, defaultInteger: 16))
var hour: Int
More complicated data types can be represented by conforming to various protocols, such as AppEnum to provide users with a choice based on an enum:
enum Weekday: Int, AppEnum {
    static var typeDisplayRepresentation: TypeDisplayRepresentation = "Weekday"

    case Sunday = 1
    case Monday = 2
    case Tuesday = 3
    case Wednesday = 4
    case Thursday = 5
    case Friday = 6
    case Saturday = 7

    static var caseDisplayRepresentations: [Weekday: DisplayRepresentation] = [
        .Sunday: "Sunday",
        .Monday: "Monday",
        .Tuesday: "Tuesday",
        .Wednesday: "Wednesday",
        .Thursday: "Thursday",
        .Friday: "Friday",
        .Saturday: "Saturday"
    ]
}

...

@Parameter(title: "Weekday", default: .Friday)
var weekday: Weekday
Or by conforming an struct to AppEntity and the associated EntityQuery, you can add support for arbitrary data types, which is the most powerful but complicated option, such as this example for adding a time zone choice to the widget:
struct TimeZoneQuery: EntityStringQuery {
    private func convertToWidgetTimeZone(identifiers: [String]) -> [WidgetTimeZone] {
        identifiers.compactMap { TimeZone(identifier: $0) }.map { WidgetTimeZone(timezone: $0) }
    }
    func entities(matching string: String) async throws -> [WidgetTimeZone] {
        return convertToWidgetTimeZone(identifiers: TimeZone.knownTimeZoneIdentifiers.filter { $0.localizedStandardContains(string) })
    }
    func entities(for identifiers: [String]) async throws -> [WidgetTimeZone] {
        return convertToWidgetTimeZone(identifiers: TimeZone.knownTimeZoneIdentifiers.filter { identifiers.contains($0) })
    }
    func suggestedEntities() async throws -> [WidgetTimeZone] {
        return convertToWidgetTimeZone(identifiers: TimeZone.knownTimeZoneIdentifiers)
    }
}

struct WidgetTimeZone: Equatable, Hashable, AppEntity {
    typealias DefaultQuery = TimeZoneQuery
    static var defaultQuery: TimeZoneQuery = TimeZoneQuery()
    static var typeDisplayName: LocalizedStringResource = LocalizedStringResource("TimeZone", defaultValue: "TimeZone")
    static var typeDisplayRepresentation: TypeDisplayRepresentation {
        TypeDisplayRepresentation(stringLiteral: "TimeZone")
    }
    public var displayRepresentation: DisplayRepresentation {
        DisplayRepresentation(title: .init(stringLiteral: id))
    }

    var id: String { timezone.identifier }
    var timezone: TimeZone
}

...

@Parameter(title: "Time Zone")
var timeZone: WidgetTimeZone?
An extension of the Configuration Intent protocol is also what powers the interactive widgets available in iOS 17. Hopefully, once I’ve figured those out a little more, a future post will cover the basics of them too!